Where Can I Buy a Green Leather Dress Belt
Introduction: Leather Pocket Belts
In this Instructable I'm going show you some techniques for creating different styles of simple leather belts from leather hides. I created these belts to attach to pocketable pouches Eastern Samoa pocket belts, but you could use these techniques to create typical non-pocketed belts too. As a girl who frequently wears clothing without pockets I find pocket belts passing reclaimable and freeing at events and festivals or just around the shop. It's nice to have freedom of movement and full practice of my manpower when I lack to shake my booty, ship on adventures, use tools, or just carry my phone with Pine Tree State as I work so I can listen to all the podcasts.
A hatful of the techniques I'm using in this Instructable, including how to take a leak the leather pouch I am attaching to my belt, are explained in my free Beginning and Intermediate Leatherworking Classes, so be confident to check those out if anything in this instructable confuses you.
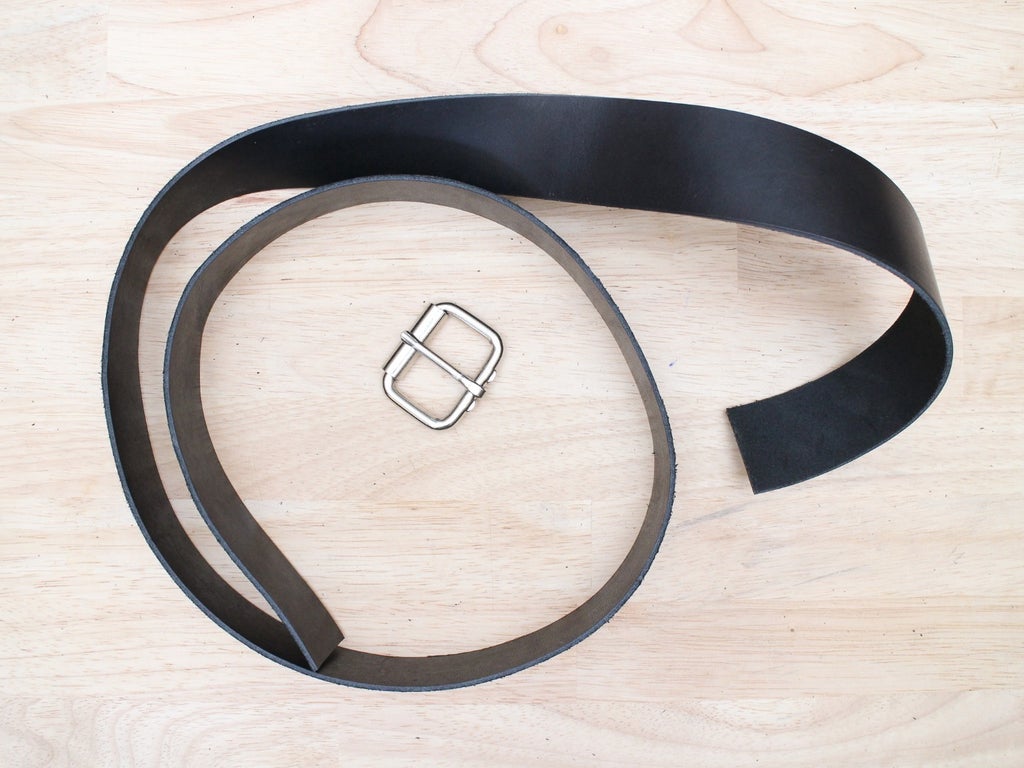
Step 1: Tools and Materials
Step 2: Uniform Layer Belts
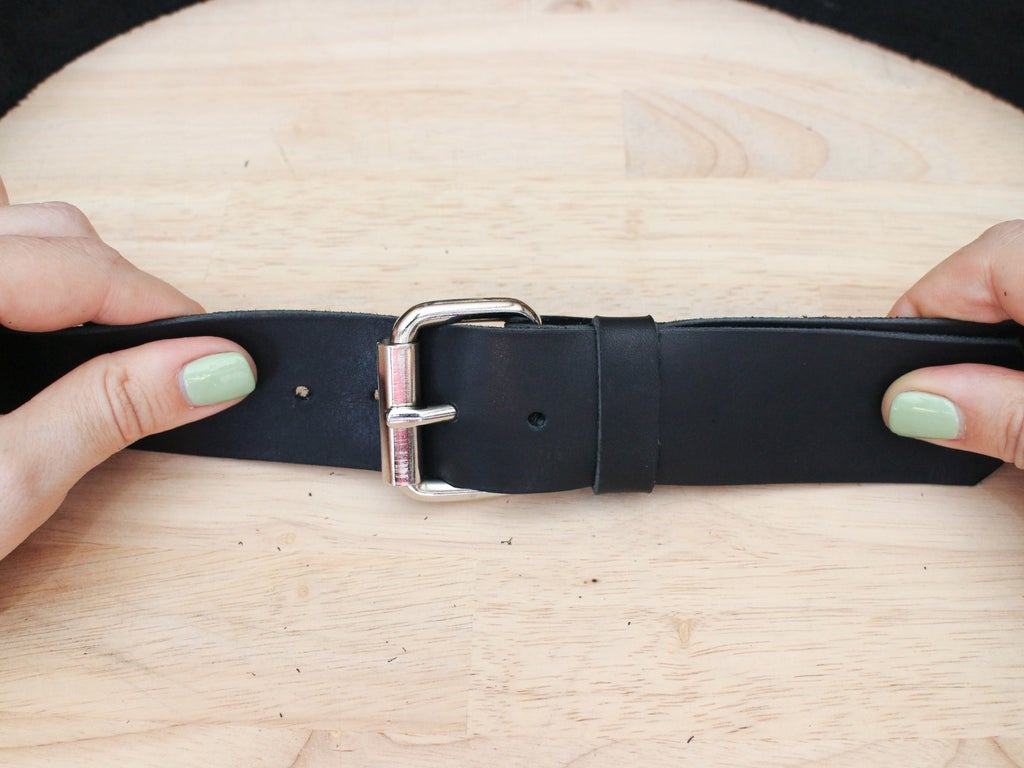
When you want to create a belt outgoing of single layer of leather, you need to use leather that is thick and fertile enough that it won't stretch or break. You should choose a leather that is at any rate 7-10 oz and not elastic. Very much of belts are made from stocky veg tanned leather, but in the chrome tanned leather world, a thick latigo, or equal a stiff sealed leather can be a good choice for a single layer belt.
If you want to make a belt that is intended to work through standard knock loops, it generally needs to be to a lesser degree 1 3/4" wide. To get the duration of the whang, the best way is to measure a rap that is already played out away the someone you are making it for. Everyone wears belts at different heights and levels of tightness, so using a standard waist measurement can glucinium problematic. If you don't have a belt for character reference, measure around the person's waist where they are going to wear the belt. Add at the least 2" to one end for the clasp, and well-nig 6" to the other end for adjustable holes.
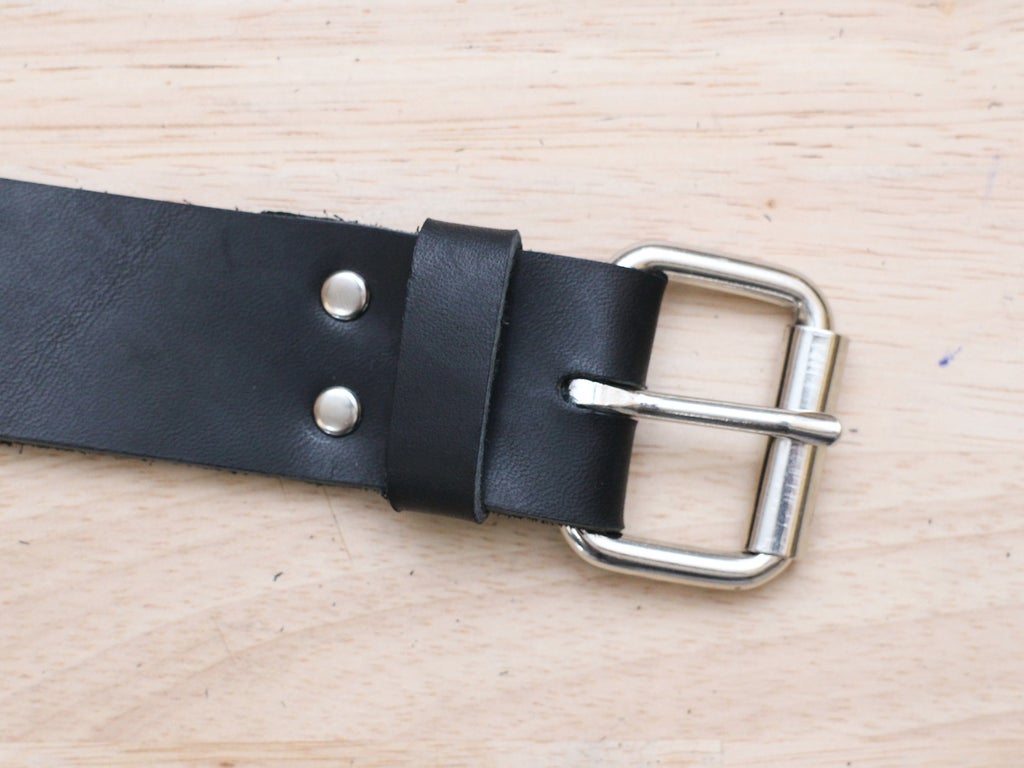
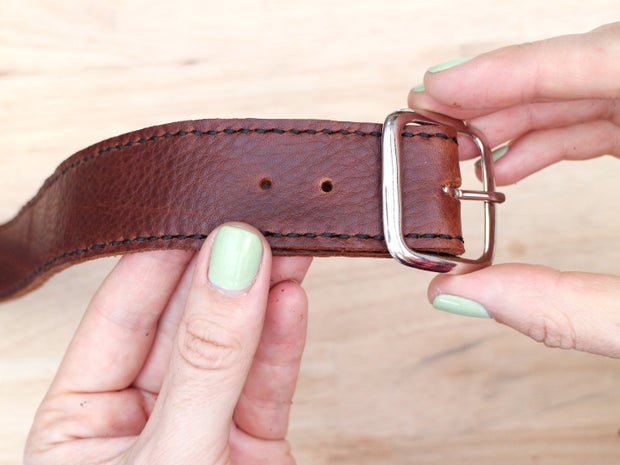
Cut the belt out with a cutting wheel Oregon lash cutter, and attach a buckle of your choice As we did in the previous lesson.
If you are using a heel debar buckle you need to add a steward loop, so make extraordinary if you pauperization one. Heel bar buckles are the acceptable choice for belts, merely on that point are other options as well.
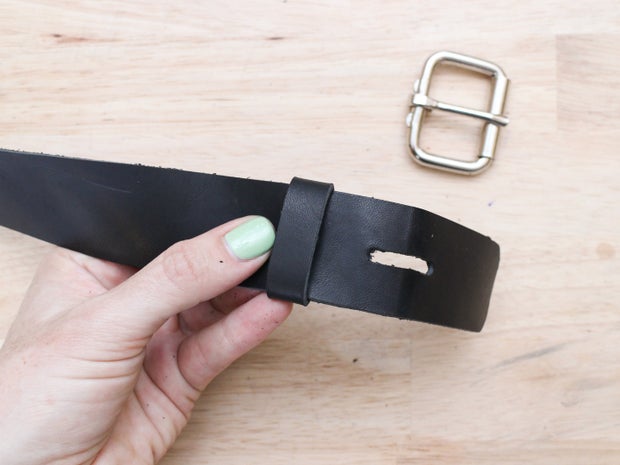
If you can, mark the position of the holes by having the person WHO is releas to wear the belt try it on before you bif them.
Ill-use 3: Double Layer Belts
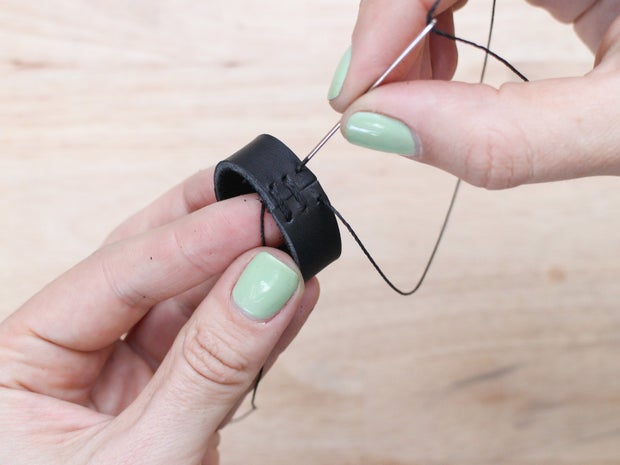
If you don't accept leather that is thick enough to be used as a unity layer belt, you can reinforce diluent leather by sewing cardinal layers collectively. This can be fairly time consuming when you are helping hand sewing, but IT does produce a nice processed look with the grain of the leather facing out happening some sides.
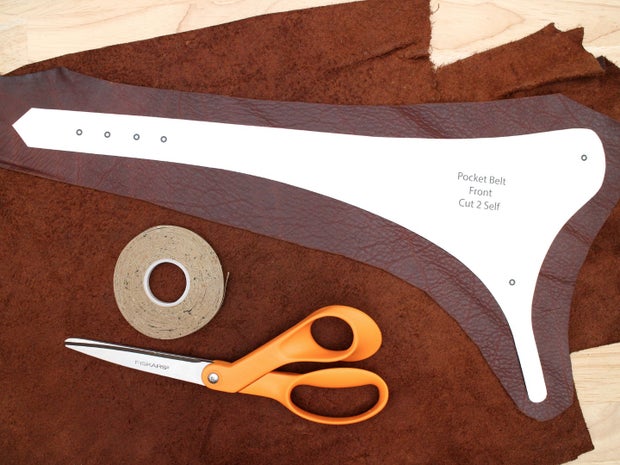
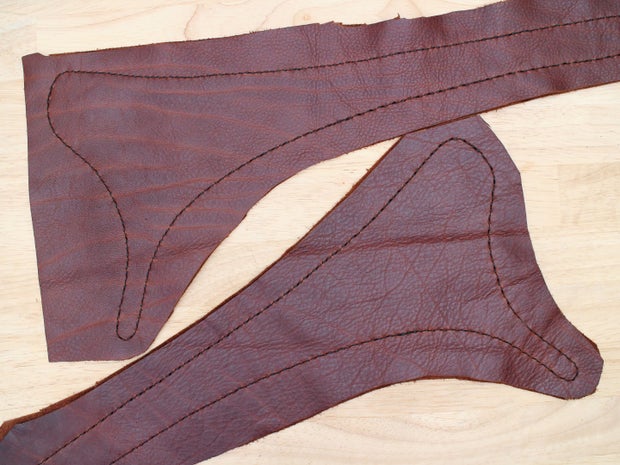
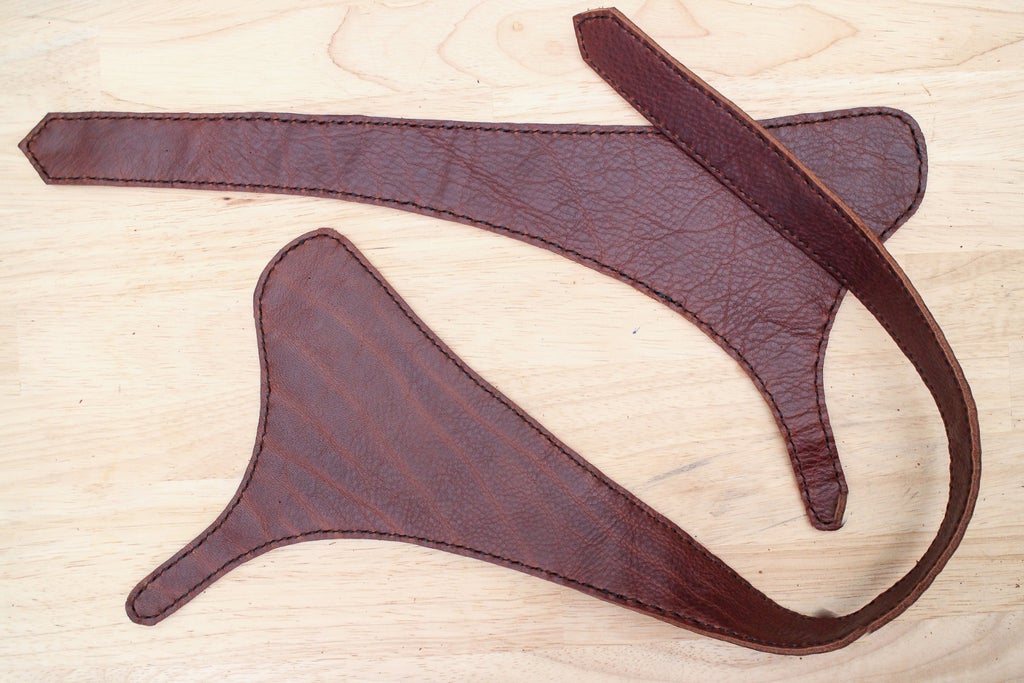
To make over this kind of belt, design your pattern basically the selfsame way you did for the single bed knock, only add a sewing line about 1/8" from the edge of the pattern. In this case, I'm creating a shaped belt out that will attach to uncomparable of our small bags and turn to it into a hep bag. This belt will be 2 sections that stud together over one hip, and buckle all over the other. I made a mock-leading of the belt first in oaktag, and then scanned it and traced IT in Illustrator.
To get perfectly matching edges on the two layers of leather on apiece piece of the belt, I usually don't pee-pee my unalterable edge cuts until I accept sewn the two layers together. To do this, cut a piece of leather at least 1/4" large than your pattern along wholly sides. Then gum, or threefold sided tape, this piece of leather to other piece, chassis sides together, and cut the second piece to the same size as the low.

Now hint the sewing lines of your pattern onto the leather (I cut my report pattern pieces out along the sewing lines alternatively of the cutting lines, and so just traced around the edges). Punch sewing holes along these lines with a stitch cheat or an awl.
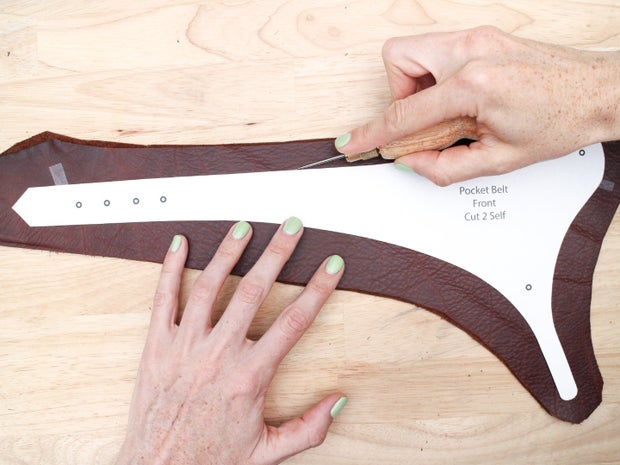
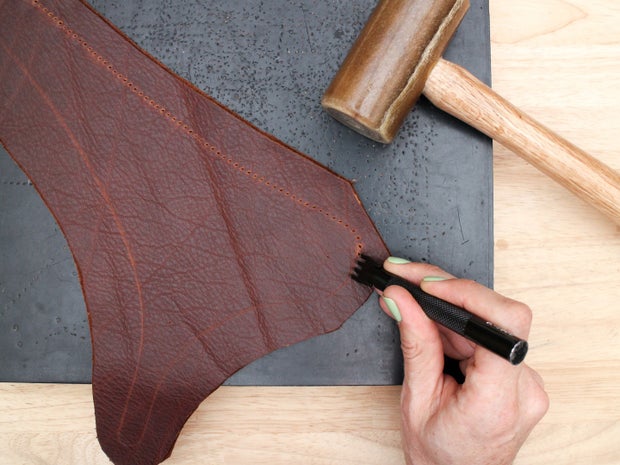
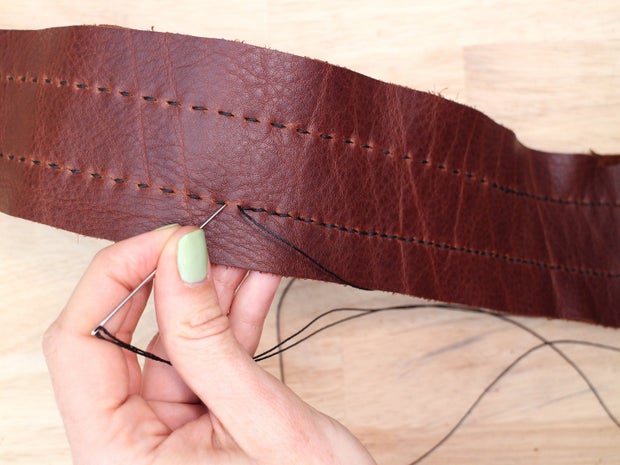
Sew around the leather, attaching the two layers of the strap or belt with a saddle stitch.
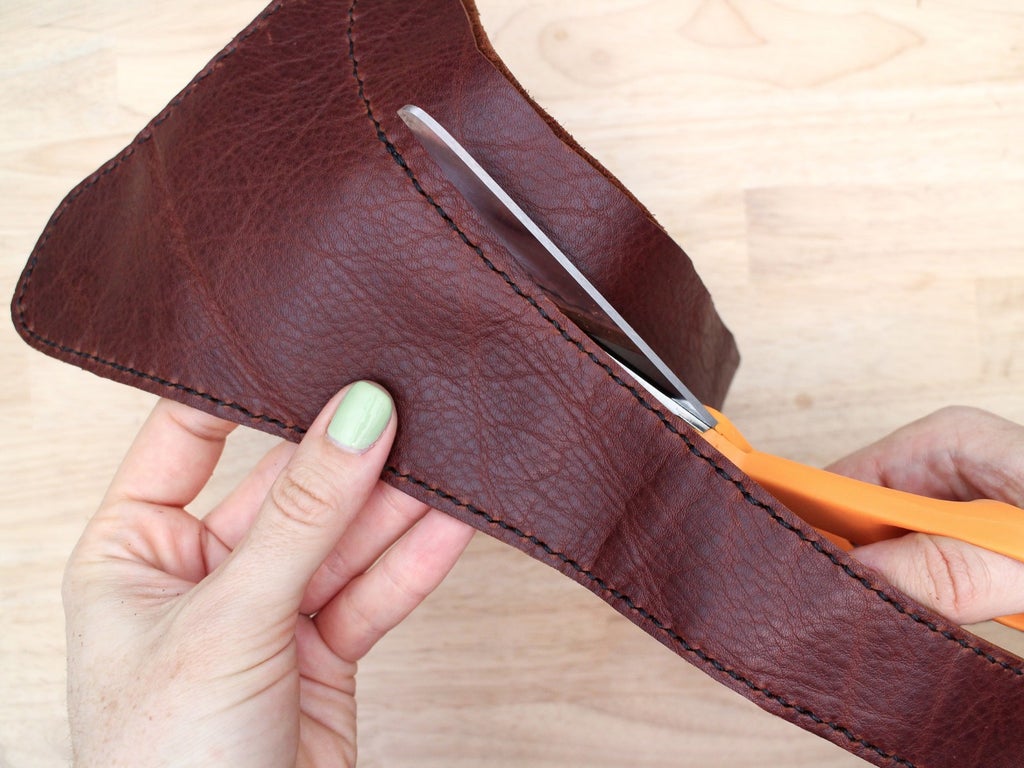
Now, with scissors, or an X-Acto knife, with kid gloves cut 1/8" out from the sewing line to create a clean edge.
Add a clasp, snap or other closure to your strap or belt in the same way you would if it was a concentrated layer. Vindicatory be surely to never punch through your stitch lines when you are adding computer hardware.
Step 4: Victimisation Grommets
If you deficiency to link up things to your belt or turn on it into a pocket belt, adding grommets can follow very useful.
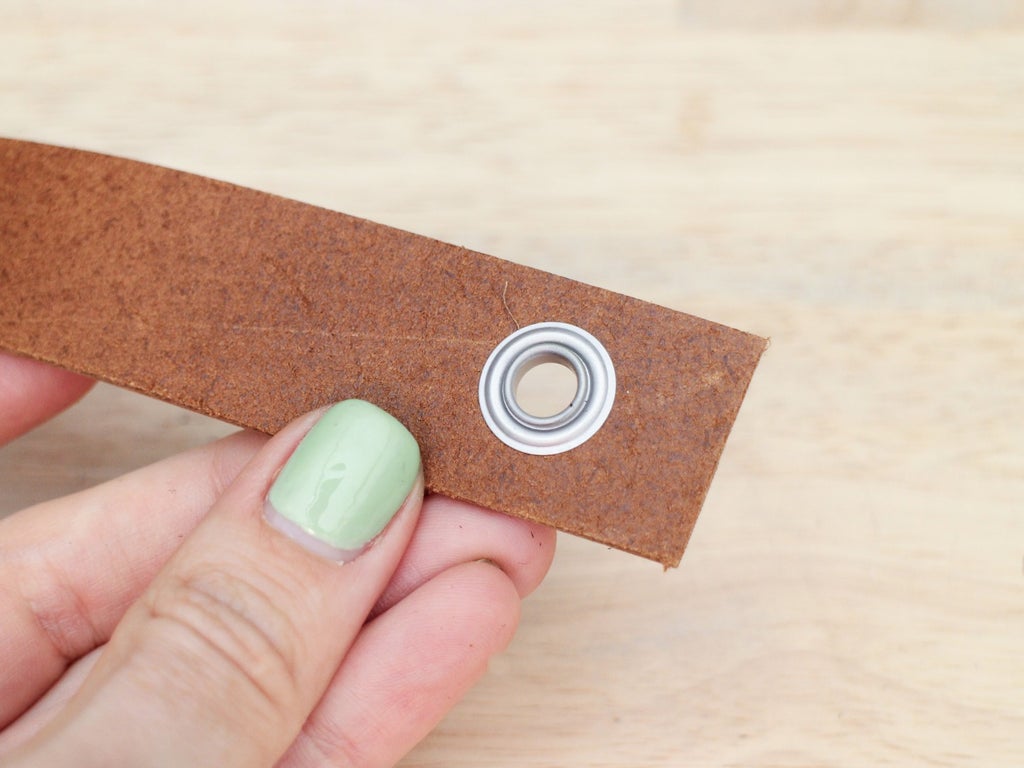
Grommets are ii function bronze rings that make a reinforced mess in leather. They are often used to create attachment points for other hardware, Oregon small holes for lacing up a wearable leather piece like a corset, shoe or arm bracer. They give notice also hold two or more pieces of leather together like rivets with a hole through the center. You can even use them strictly for medal, like I did happening my Millennium Falcon Bag.
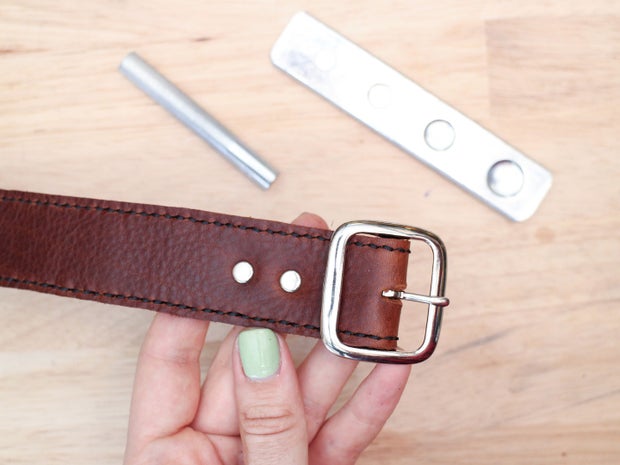
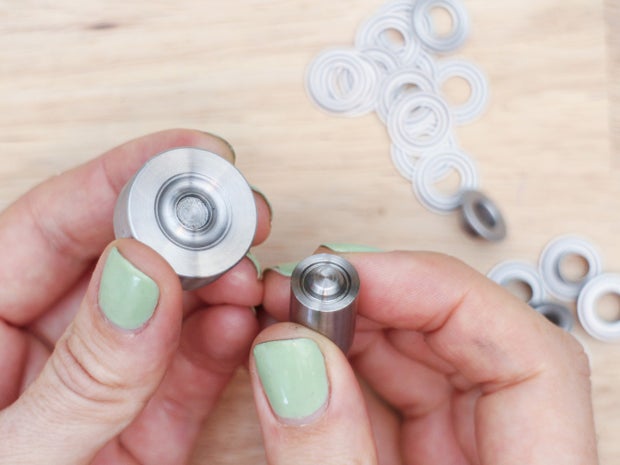
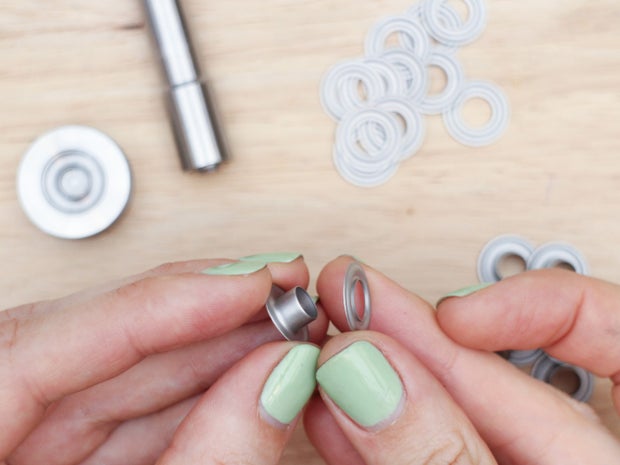
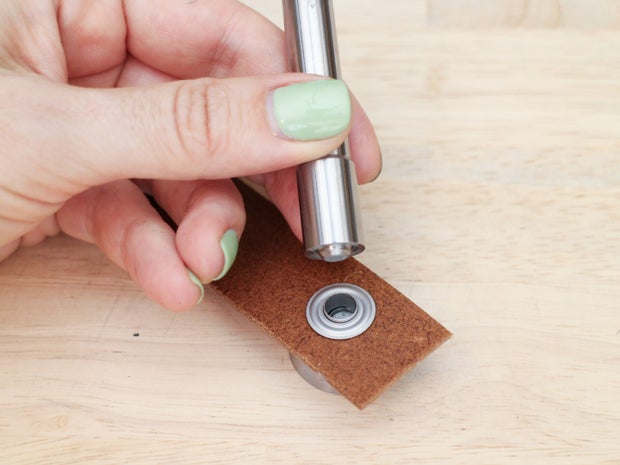
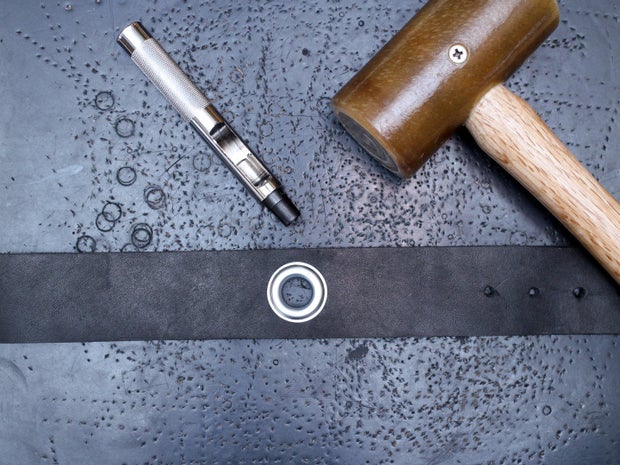
Grommets come in all different sizes and each size needs a contrasting setting tool, which can comprise annoying. The setting tools have two parts like a crack setter. A cupulate base that holds the top of the grommet and a shaft with a shaped terminate that you expend to forge the two pieces together.
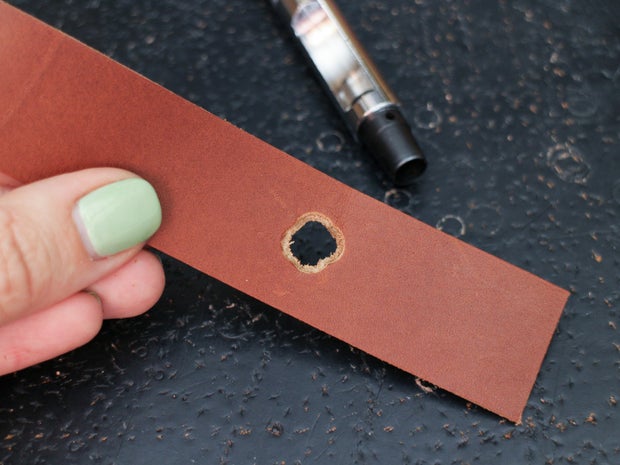
To set a grommet you first pauperism to cut a hole the decent size, which is a great deal bigger than standard leather hole puncher sizes. Grommet setting kits sometimes come through with punches the rightfield size, or you can buy them one by one. You can likewise just use of goods and services your largest existing yap punch and punch several multiplication to create a large enough, if slightly misshapen, hole.
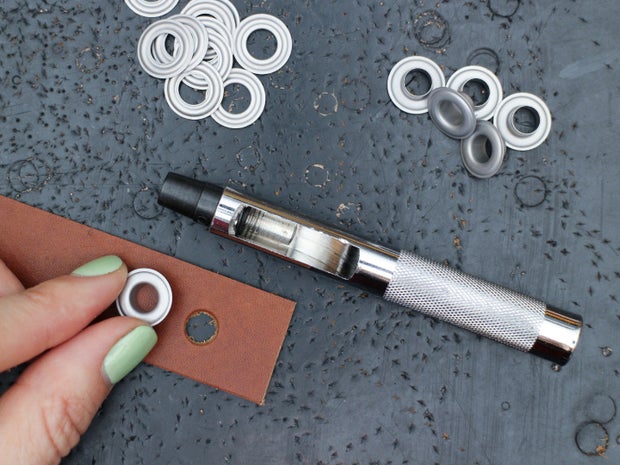
Erst you have a big sufficient hole punched, push the larger top art object of the grummet through with from the grain side and sloping trough the smaller bottom ring over the center stem on the flesh side.
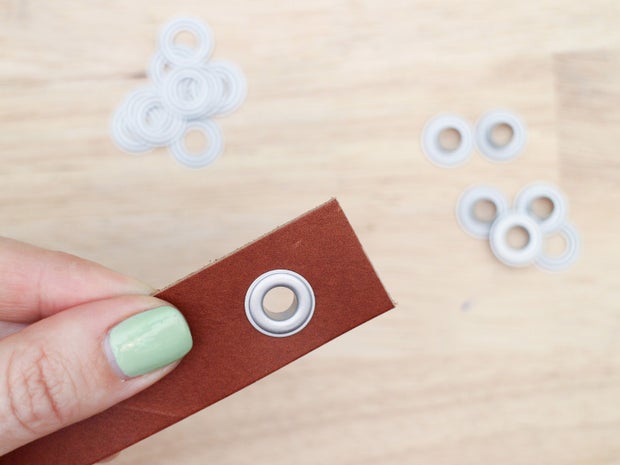

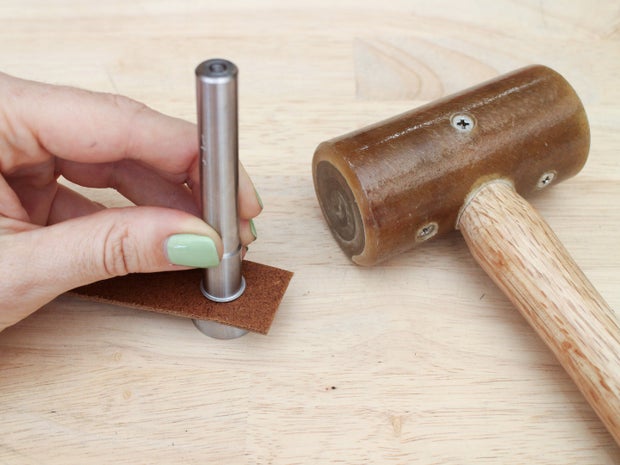
Use the setting irradiatio and a beetle to hammer the two halves jointly. IT can direct a bit of force out to set them properly.
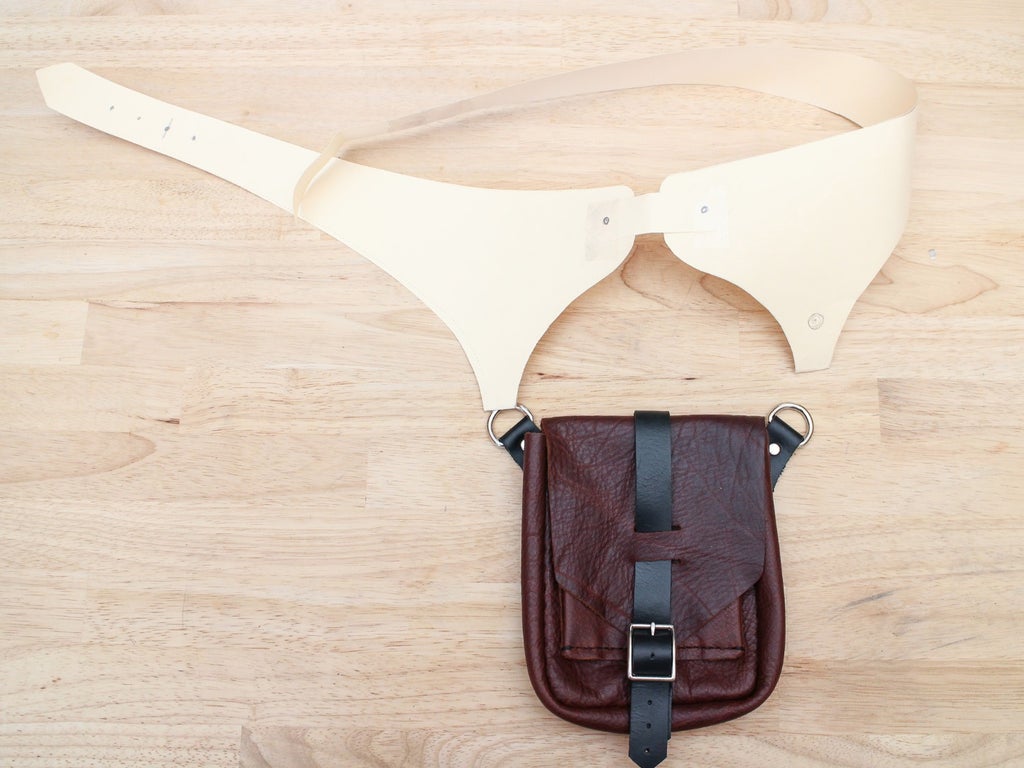
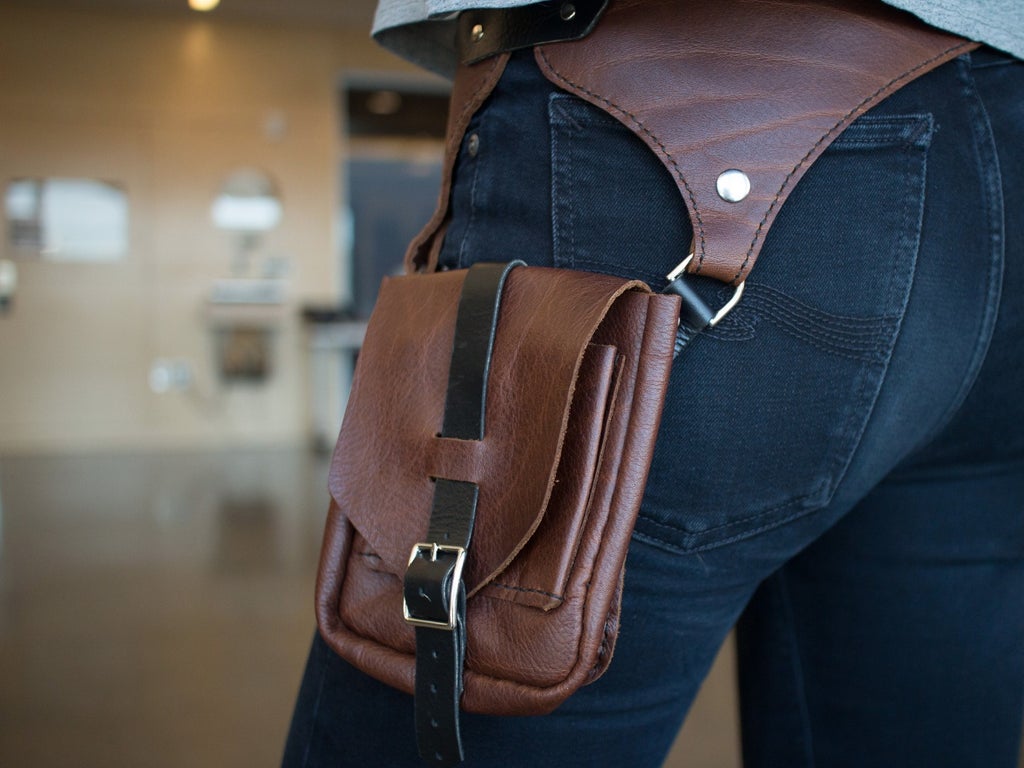
Step 5: Wrick a Belt Into a Pocket Belt
But wherefore just make up a boring belt when you can add a useful pocket?!
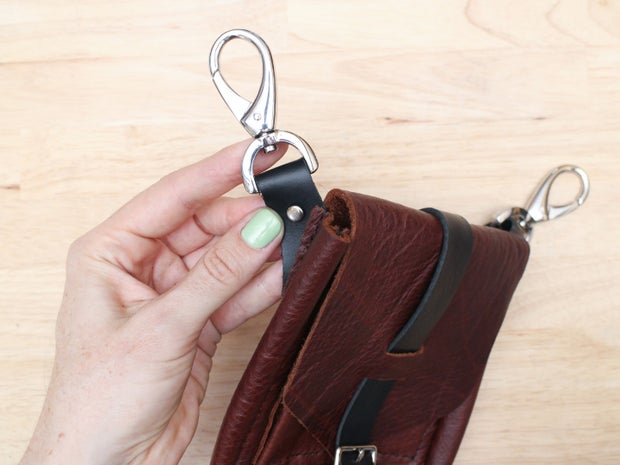
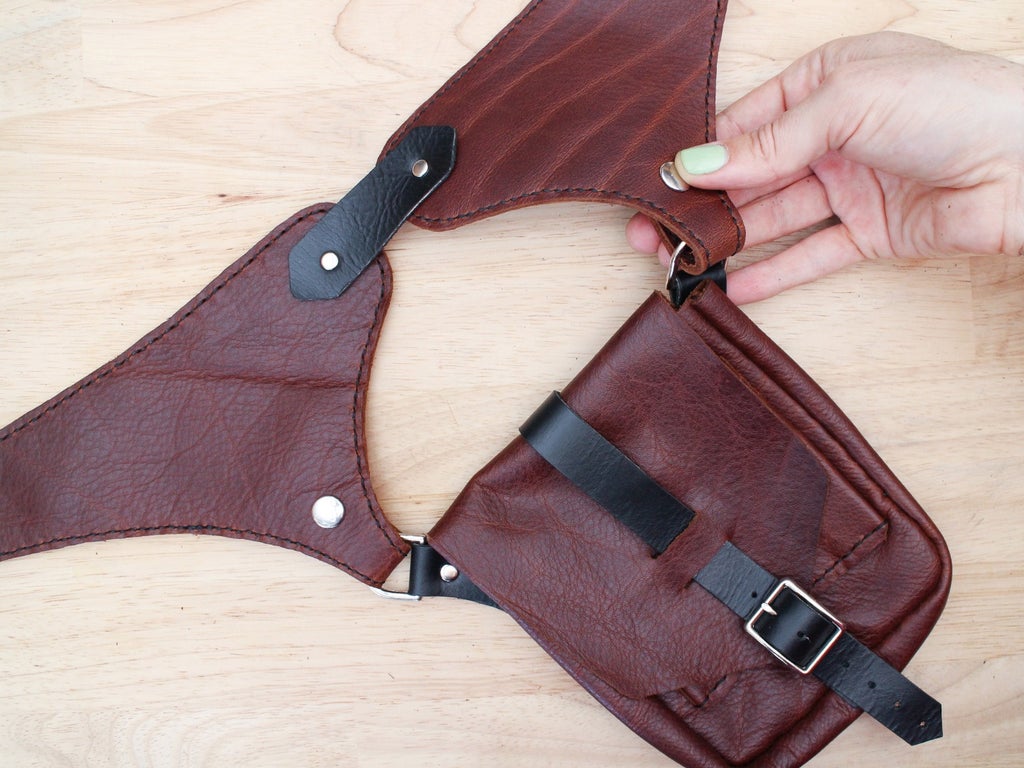
I upside-down the two belts I made into pocket belts by attaching the small leather pouches you can make in my Intermediate Leatherworking Class. There are a lot of ways to add pockets to belts, you could just thread a belt through the strap loops in the back of these minuscule pouches. But I wanted to turn around mine into more of a low hanging hip bag, which is why I created attachment points on the belt to bent the traveling bag.
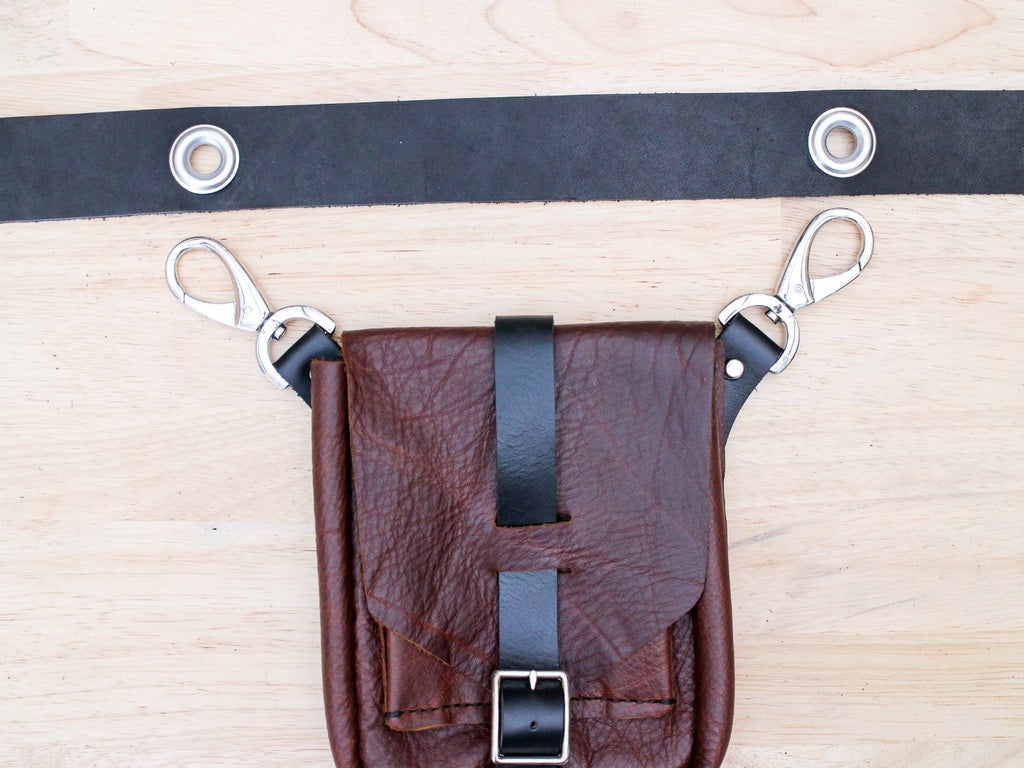
One fashio to do this is to attach swivel snaps strap loops of the bag. Then you can use these to clip and unclip the bag to an bond point happening the belt. I did this here by setting two grommets into the belt where the old bag can attach.
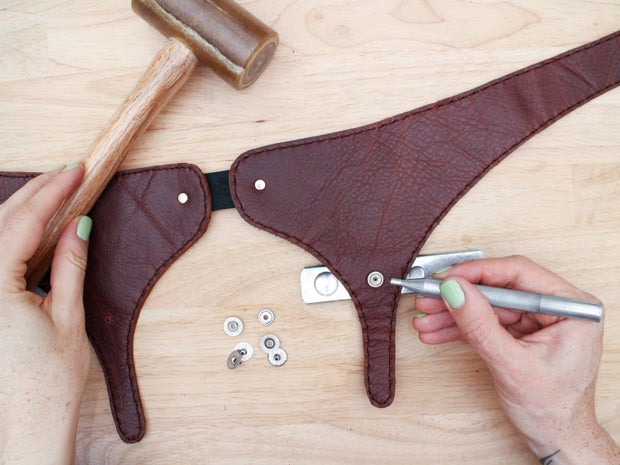
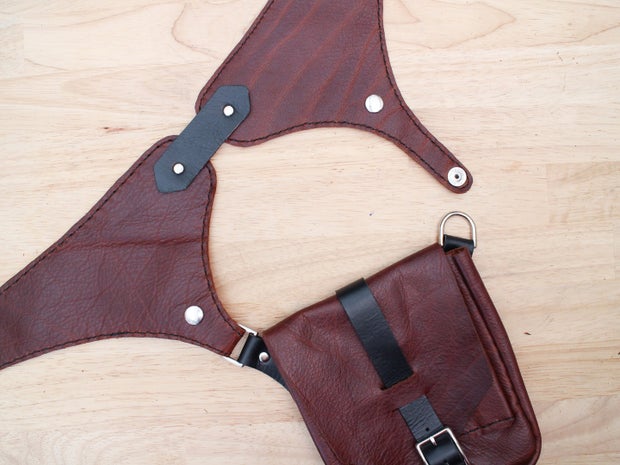
As another option, I configured the replicate layer belt I successful with assembled in straps that loop just about the D rings of the small bags. I set snaps into the straps so the bag could bond and detach.
Step 6: What's Your Version?
I've shown you a couple of simple options for creating a leather belt out that butt attach to a traveling bag, and I'm sure enough you posterior think a lot more designs from here! You could try different shapes for the shaped leather belt, use different hardware, eventide unified another a smaller pocket into the rap itself. If you made two identical small bags, you could create a similar belt with bags on both sides!
If you've chosen to make over a air hole belt, post an I Made IT below in the comments section! And if you desire to learn how to make the leather pouches I wont to create my air hole belt, check out my free Intermediate Leatherworking Class!
Be the Ordinal to Partake in
Recommendations
-
Anything Goes Contest 2021


Where Can I Buy a Green Leather Dress Belt
Source: https://www.instructables.com/Leather-Pocket-Belts/
Post a Comment for "Where Can I Buy a Green Leather Dress Belt"